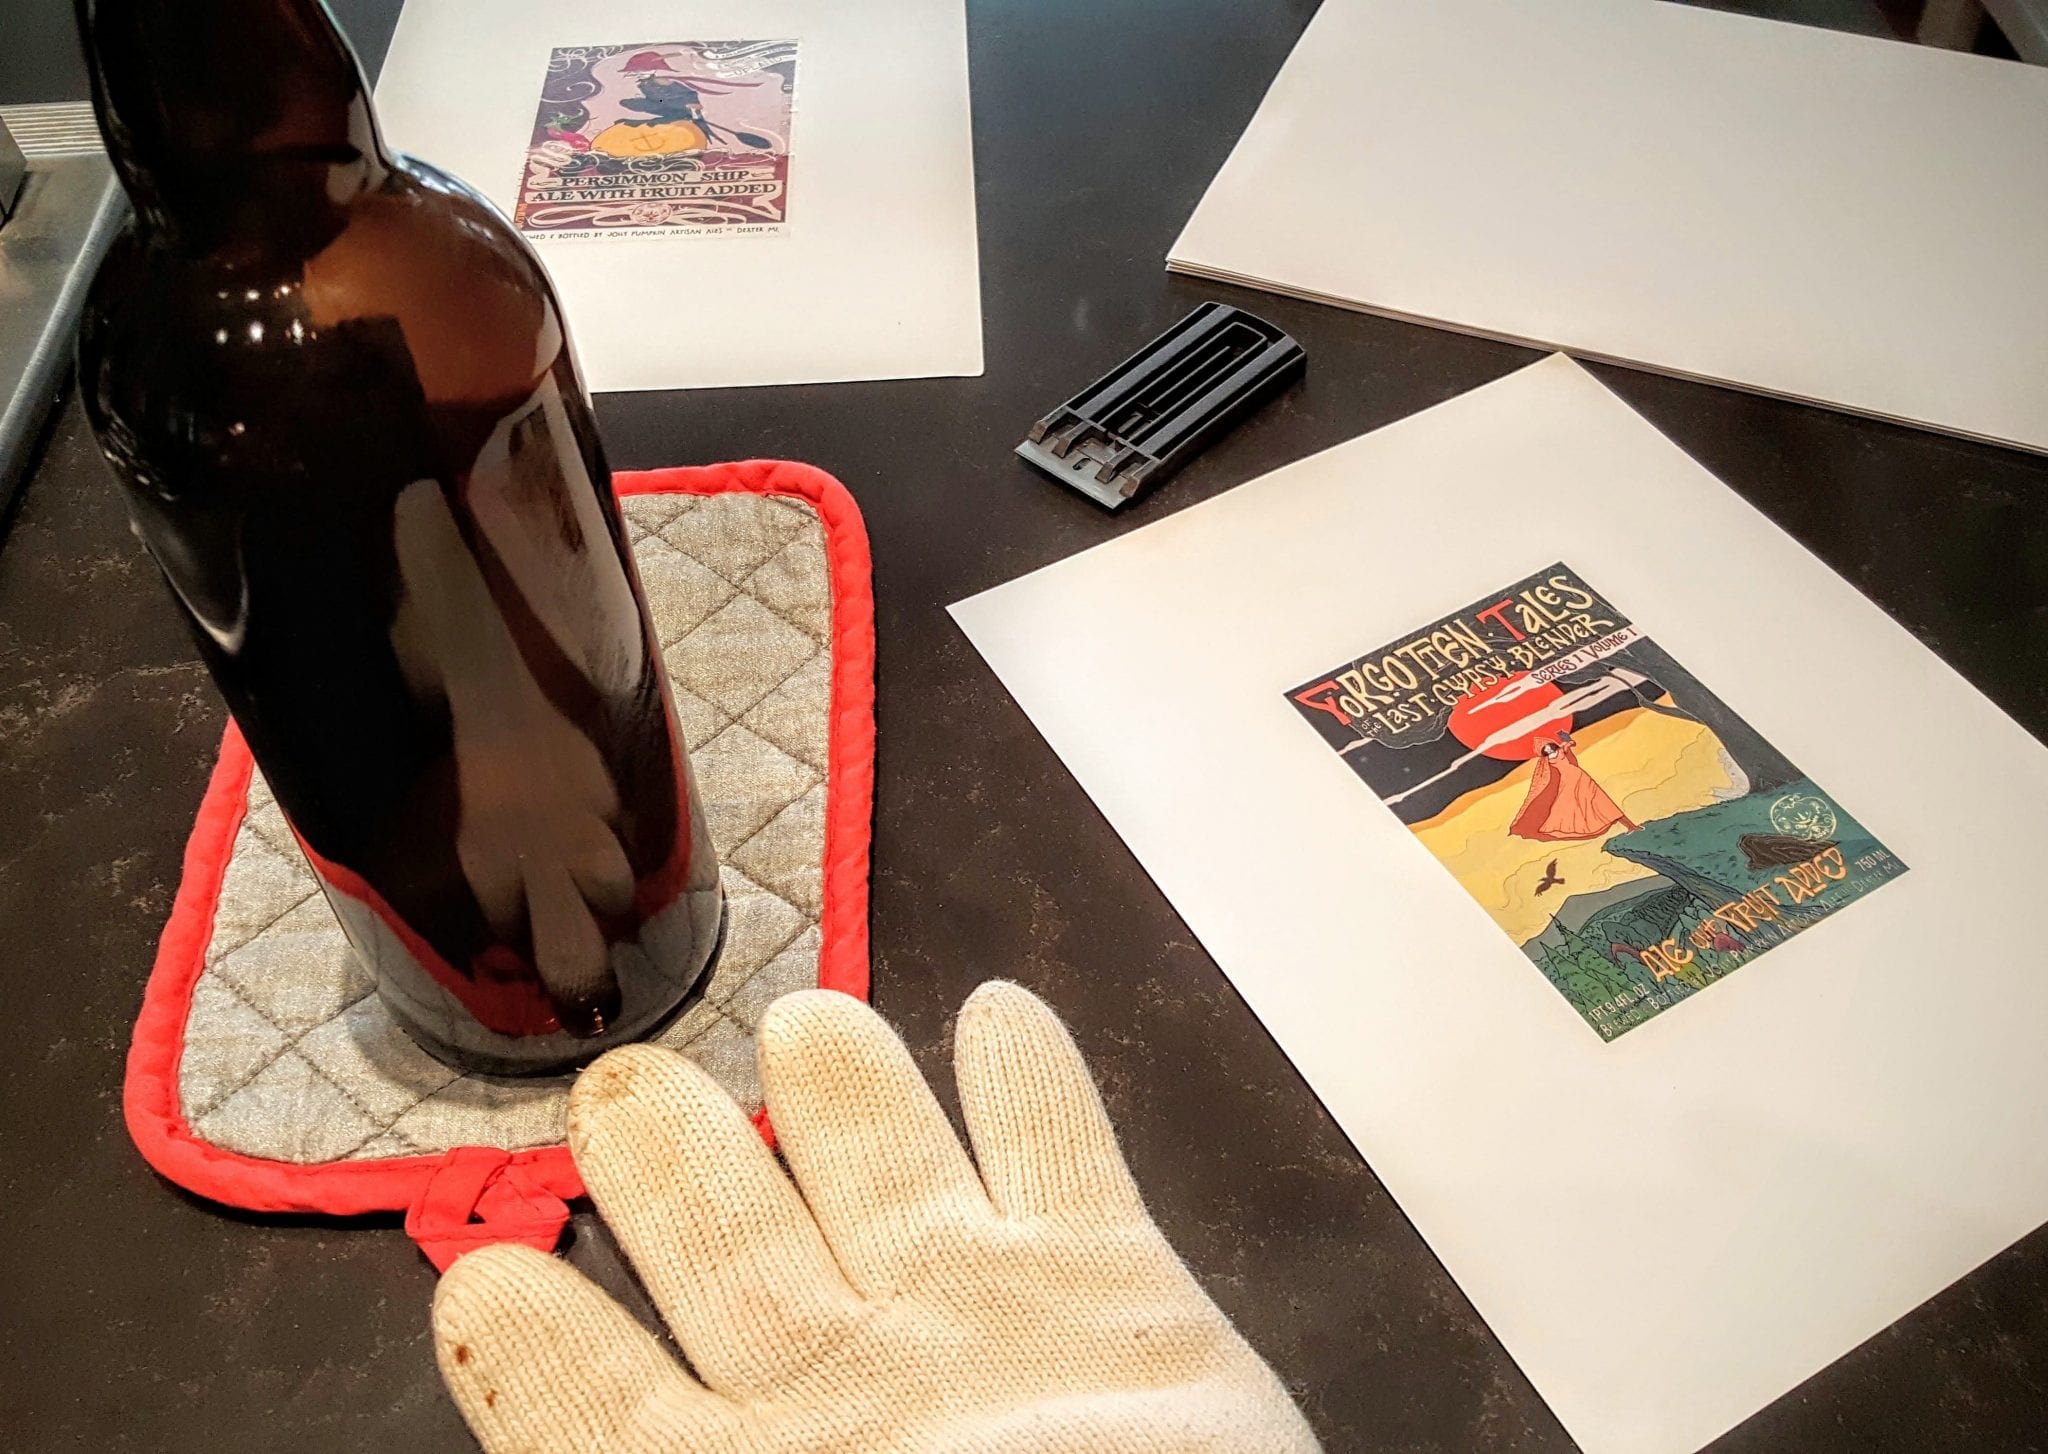
 Today I’m going to show you how to remove bottle labels from any bottle quickly and intact. I’ve read dozens of posts on the subject and I’ve been astounded at the variety of methods out there that folks will recommend. I’ve put those methods to the test and boiled it down to a technique that is foolproof, fast, and super easy.
There are those of us who regard the label on a beer bottle as something akin to a 12-ounce art installation. Chances are really good that you’ve run across a label that you want to save, for whatever reason. Maybe you’re one of those weirdo scrapbookers. Perhaps you’re just old and senile and you want to remember the beers you’ve had. My glassblowing guy Nick up on the North side can make me a sweet tile coaster out of my labels (instructions below). Regardless, removing an intact beer (or wine) label is an art unto itself, and we’re about to master it right here.
How the SOB Method Will Make Art Out of the Labels You Want to Keep
The Thirsty Bastards SOB Method will allow you to remove labels quickly, without damage, and using minimal tools you likely already have so you can save the labels that are precious to you. SOB stands for “Soak or Bake” and you need to figure out which is right for your label.
The steps for this technique are extremely simple:
- Determine what kind of adhesive was used on your label
- Use the appropriate method for removing your label – Soak or Bake?
- Transfer your removed label to its new home
Mixed Opinions About How To Remove Bottle Labels On The Internet? Surely You Jest!
When it comes to removing labels intact, there is a lot of advice out there regarding the best solution to remove the labels intact. For example, for soaking labels, advice can be found using some variation on Oxiclean, baking soda, dish soap, and of course, hot water.
Among the many claims you’ll read, the one that jumps out to me is that “by using this method, the labels will simply fall off the bottle”.
We decided to put label soaking recipes to the test and see if this is true and, if so, which method is the fastest.
TL;DR It’s really no contest. A solution of Oxiclean and water IS indeed the fastest and the label does fall off very quickly. The rumors are not only true, it’s kind of embarrassing to suggest anything else.
The Label Removal Solution Test
I pitted the three most popular solutions against each other as well as plain old hot water. I set a camera up for time-lapse capturing and a four-minute delay between shots.
I picked bottles from New Glarus Brewing based on the following criteria:
- They passed the “dry vs sticky” test, making them good candidates for using the Soak method.
- The feel of the labels is very “papery”. The texture is matte, there isn’t a ton of ink on the labels, and they feel, for lack of a better term, raw.
- I’d already tried removing New Glarus labels using the adhesive label saver with mixed results. I thought that perhaps the matte, papery quality of the labels might adhere better to the laminate, but this was not the case.
- Removing them with a razor alone was nearly impossible.
I chose four vessels with enough volume to both hold the bottle and the solution AND display them nicely for a time-lapse. The bottle allowed for 12 ounces of water, so all solutions were scaled down to an appropriate ratio.
The Solutions
Having thoroughly researched all manner of articles that particularly focused on being able to remove the labels intact, I settled on three water solutions that varied enough to be good candidates. I used plain hot water as my “control” cuz, you know, that what they say in science places. Er, labs?
Nearly all of the solution recipes I found used a full sink as the unit of measurement of hot water. The ratios of the other ingredients were maintained but went no lower than ¼ of a teaspoon. That’s as low as my kitchen goes when it comes to dry measure – sorry! Sheesh.
Oxiclean and Water
This by far the most recommended solution. Many sites claimed that if you filled a sink with this solution and put your bottles in, you’d come back in under an hour to find the labels floating to the top. So the basis for this solution is one sinkful of water to one scoop of Oxiclean or roughly 1.5 ounces by volume.
I found this on Patrick Barry’s post on the subject.
Baking Soda and Water
It has been suggested to me that using something less abrasive, like baking soda, will result in less fading of the label. Couldn’t hurt, right?
I found this solution on the Popular Mechanics website.
Baking Soda, Dish Soap, Vinegar, and Water
This one had the added bonus of fizzy action. You can’t argue with fizzy action. Lesser men have tried and failed.
This solution came to me via Pinterest and the Healthy, Wealthy, DIYs website.
Soak Test Results
It’s obvious that water is not enough. I think you could safely argue that the longer a label is submerged, the lower its aesthetic integrity (although that might be a good experiment on its own). But water needs help if you want your labels off fast.
Water and Oxi won by a landslide and it certainly seems that if you were to walk away and come back, your labels would be floating around in your sink.
Enough of Your Stupid Science – Let’s Remove Some Labels!
Are you ready to extract those labels? We’re armed with the best tools and information. Here’s how to do it.
Oh hey! FYI… any links on this page that lead to products on Amazon or other online retailers are affiliate links and we earn a commission if you make a purchase. Thanks in advance for your support!
Step One: The SOB Method or “What Glue Is That?”
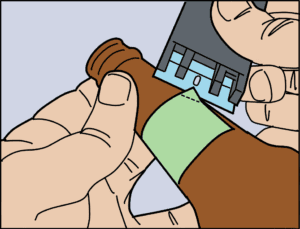
Take your razor blade and begin to get under a corner of your label. This is a good test to do on a back label you might not be saving. You want to determine if the glue under the label is sticky or dry. A good measure of this is if the razor sticks to the back side of the label when you try to get under it. If it does, that’s sticky. If you hear a dry scraping noise and the razor comes right out from behind the label, that’s dry.
Generally speaking, if your glue is sticky, you’re going to Bake it. If your glue is dry, you’re going to Soak it.
Step Two: How To Get That Label Off
Baking “Sticky” Labels Off
Tools: Oven, oven mitt, thick towel (or any heat-resistant work surface, even the other oven mitt), razor blade, card stock
The concept here is simple – the glue on your label is sticky (as opposed to dry) and applying heat to the label will make it weaker. It won’t fall right off, but you will greatly improve your chances of getting it off intact. These labels are often referred to as “peel and stick” or simply “sticker labels”.
Some people will tell you that using a hair dryer is just as good as the oven. Personally, I only have two arms, so I recommend the oven.
- Preheat your oven to 350℉
- Place the bottle in the middle of the center rack of the oven, label side up
- Bake the bottle for 5 minutes. No more. Some labels will start to melt if you leave them in longer.
- Put the oven mitt on your non-dominant hand
- Carefully remove the bottle from the oven, holding it by the neck
- Rest the bottom of the bottle on your work surface
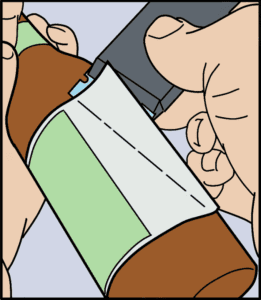 Starting at the same edge as your dominant hand (righty? Start on the right), use the razor to get underneath the edge of the label. It should slide right under like butter.
- Hold the razor at as acute an angle as possible. That is, if you imagine the surface being flat, hold it nearly flat against it. 10-15 degree angle.
- Lift the entire edge away, using only the razor. It might be tempting to get your fingers under and pull. This will add creases to your label.
- Work across the entire label in this way, loosening it vertically before moving horizontally.
- Be sure to adjust the angle of the blade as you work across the round surface.
- Work slowly and carefully. Moving too quickly will result in cutting or creasing the label.
- The label will come off easily, so concentrate on maintaining the integrity of the label itself.
- If your hand gets too hot under the mitt, give it a rest, but set your bottle upright if possible. You don’t want it to roll across the table.
- Once the entire label has been worked free from the bottle, carefully set the bottle down and remove your oven mitt. Yeah, use your teeth.
- Mount the label on the card stock
- Center it as best you can. If you’re REALLY anal about this, measure the label ahead of time and draw some guidelines on your card for placement. Do this lightly in pencil so you can erase it later.
- If you have a very long label, it may help to start at the center when you place it on the card, smoothing outwards.
Soaking “Dry” Labels Off
If you’ve determined that the glue on your label is dry, soaking it off may well be your best bet. It’s risky, though – some labels will get damaged by submerging them in water for a few hours. I’ve seen the ink of some labels start to dissolve. If you are risk-adverse, you have another couple of options. Otherwise, just jump right to the steps.
The first option is to try using wine label removal sheets. These are clear adhesive sheets that are available, like most things, on Amazon. Arguably slightly less risky than soaking a label, this method will definitely keep your label dry and intact, but also laminated.
If you are the VERY patient type, you can mail (snail) a self-addressed, stamped envelope (a SASE) to the brewery with a note requesting an unstuck label. Make sure that the envelope you include A) has enough postage and B) is big enough to contain the label without folding. I recommend a cardboard backing board to keep them flat. What you’re doing here is making it as effortless as possible for someone in the brewery office to get off their chair, grab a label, stuff it, and put it into the “out” box. Yes, it works. Yes, it could take weeks.
If neither of these options appeals to you, let’s dig into the steps for soaking a label off of a bottle.
Tools: A sink or large vessel to hold as many bottles as you’d like to soak, hot water, Oxiclean, razor blade, wax paper
| Water | Oxiclean | |
|---|---|---|
| Sink | 10 gallons | 1 full scoop (3 ounces by volume) |
| Bucket | 1 gallon | 2 teaspoons |
| 24 ounce vessel | 12 ounces | ¼ teaspoon |
- Fill sink or vessel with hot water
- Add Oxiclean and stir thoroughly
- Set a timer for 15 minutes
- Check back to see if any of your labels have fallen off. If not, return to Step 3 (set another 15 minute timer)
- If after an hour, your labels have not fallen off by themselves, the glue’s pretty tough and you will need to manually remove them.
- Remove the bottle from the soak and empty it out
- Dry the bottle off with a towel and gently blot the label surface to remove excess water
- Starting at the same edge as your dominant hand (righty? Start on the right), use the razor to get underneath the edge of the label.
- Hold the razor at as acute an angle as possible. That is, if you imagine the surface being flat, hold it nearly flat against it. 10-15 degree angle.
- Lift the entire edge away, using only the razor. It might be tempting to get your fingers under and pull. This will add creases to your label.
- Work across the entire label in this way, loosening it vertically before moving horizontally.
- Be sure to adjust the angle of the blade as you work across the round surface.
- Work slowly and carefully. Moving too quickly will result in cutting or creasing the label.
- The label should come off easily, so concentrate on maintaining the integrity of the label itself.
- Once the entire label has been worked free from the bottle, place it face-down on the wax paper.
- Allow the label to dry completely before handling it further
Step Three: I’ve Got It Off, Now What?
Label Album
Head down to your local office supply store (or Amazon, of course) and get yourself some nice sturdy card stock and binder. A three-hole punch might help too. Soon you’ll have a lovely record of all your beer escapades. Wine drinkers have been doing this for decades.
If you soaked your label off, then you probably need some glue. Wuffling.com has a lot to say about glues, but to cut to the chase, acid-free glue sticks are the easiest to use.
Framing
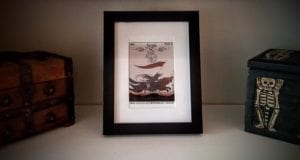
Frames the size of a beer label are cheap and easy to come by. I recommend buying frames with the matting included so your label doesn’t stick to the glass. You want to measure the mat opening and compare against the size of the label to make sure it displays nicely.
I like these frames from Craig because they have a lot of opening options AND I can still display my labels consistently in the same simple black frames. 4” x 4”, 4” x 6”, 5” x 5”, 5” x 7” – LOTS of options.
The same goes for these frames from Prinz, although they don’t have quite as many options.
Coasters
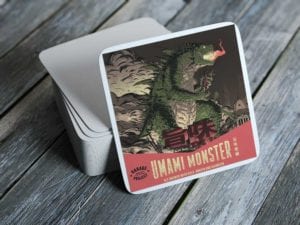
Feeling crafty? How about sticking your label to a kitchen tile for a handsome coaster? Pop Sugar has this all figured out for you
Screen Printed Labels
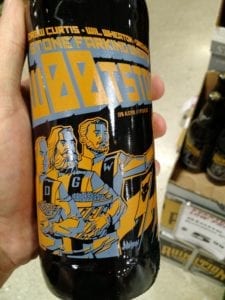
What about bottles you want to save that don’t actually have labels stuck to them? These bottles have the ink directly applied to them using a process called silk screening. Basically, it’s the same as having a t-shirt printed and that ink ain’t coming off.
If a brewery went to the trouble of using this process for their bottle printing, these are usually pretty stunning. There’s a good chance you want to show these bottles off. What to do, yo?
What you want to do is find yourself a glass blower. These talented artists can reheat and reshape your bottle into something else, like a drinking glass or a carafe.
Here’s a little video of Nick Paul of Chicago reshaping my Omnipollo bottles into glasses.
Conclusion
This a pretty exhaustive post on the subject of removing labels intact. We’re pretty sure we covered everything, but I’m sure you can think of something we haven’t. Leave a comment and let us know what we left out.
Label collection “Beer Labels” image by Jeric Santiago used under CC BY



September 17, 2018 @ 5:18 pm
The label didn’t come off using baking soda and vinegar in my case (though I no longer waited beyond an hour as I was excited to check, haha!) but nonetheless did the trick and made the peeling process smooth! Thanks a bunch, mate, and cheers!
December 20, 2018 @ 11:43 pm
Testing removal on an auxiliary label you do not want to keep doesn’t always work. I soaked my wine bottle in water and detergent. The back label come off overnight. The front label did not come off at all. Obviously different adhesives are used.
June 27, 2019 @ 11:59 am
Hey, thanks a lot for this post! I just (successfully) used your soaking method (hot water, 1tsp vinegar, .25 tsp baking powder) to safely and completely remove an uncoated paper label from a fountain pen ink bottle.
June 27, 2019 @ 12:16 pm
Glad to hear it! Were you trying to preserve the label?
December 30, 2019 @ 10:12 am
Thanks so much for the information! I have been searching for this exact thing and no one that I found had the information and detail you did. I also appreciate you including Nick Paul’s information. My husband is going to be so super surprised for his special gifts! Thank You!
December 30, 2019 @ 2:39 pm
Yay! Always happy to hear we’ve helped someone out.
January 1, 2021 @ 8:41 pm
Okay! First off, no, I don’t drink!
I stumbled on to your most excellent site by chance, as I was looking for an easy method to remove labels from some olive oil bottles.
I’m collecting these labels for research purposes as I’ve discovered that this stuff – pure extra virgin (is ‘extra virgin’ even possible?) olive oil drops high blood pressure with regular use… often in a matter of days and with no adverse side effects!
Thanks so much!
January 1, 2021 @ 10:19 pm
Fantastic! So glad we could help!
July 26, 2021 @ 9:29 pm
I would like to transfer a label from one bottle to another bottle. If I can get the label off could I use mod podge to apply it to the other bottle?
July 28, 2021 @ 3:40 pm
That depends on whether it’s a sticker or paper. If it’s a sticker, you might be able to just slap it onto the other bottle.
I don’t know Mod Podge very well, but you can’t go wrong with good old contact (rubber) cement.
January 20, 2021 @ 5:19 am
Holy f*cki** sh*t! I collect Gin bottles frown around the world, and sometimes just a random bottle of wine if the label is bad ass. Anyway, I clean them thoroughly a few hours later once they’re empty…ahem..and store them in my walk in closet I built shelves for. I have this distinct image of strategically using them to create a very large piece of mixed media(but the kind that makes sense and is interesting to look at).
If this actually works I will gratefully fly to meet you bastards, and personally use both of my hands to simultaneously give you both the most incredible high fives ever! Just won the super bowl style high fives. 😉
We shall see..
January 20, 2021 @ 11:17 am
Keep us posted!
May 15, 2021 @ 6:24 am
In the beginning of the video, the video lists baking powder. Later it has baking soda. I believe it should be baking soda.
May 16, 2021 @ 9:29 pm
Good catch! Will correct… Can we send you a koozie?
May 15, 2021 @ 8:57 am
I am thinking of trying your Oxiclean method, but I’m nervous it will bleach/fade the label. Will it?
May 16, 2021 @ 3:09 pm
Just letting you know that I tried the Oxi clean method and it worked perfectly! The first one came off at about 35 minutes, and the second one took the full hour – didn’t need to use the razor, but was prepared to…in the end they just floated to the top. The labels didn’t fade and they look great.
January 5, 2022 @ 3:08 pm
I just discovered the absolute best and fastest method for removing a sticky label. You need 3 things.
1. The bottle.
2. Boiling water.
3. Utility knife.
Pour the boiling water into the bottle. (A funnel comes in handy.) Immediately use the blade to lift up your corner. Gentle pull takes that baby right off. Intact. 😁
January 6, 2022 @ 10:39 am
Thanks for the tip, Laura! In a pinch, this works… sometimes. Not all labels are the same and can vary by thickness and adhesive strength. We wrote our “bake” instructions to work in every situation so you won’t be tossing the dice.
That said, we’ve had some good luck removing labels with hot water inside as well as OUTSIDE to really soften up that glue. Running it under hot tap water for a minute can get you good results. SOMETIMES.
April 12, 2022 @ 2:24 pm
I’ve researched this subject myself many times, I want to thank you for your detailed instructions! I also appreciate the SOB method, first time I’ve heard of it! I can’t wait to get started! Thank you again!
November 1, 2023 @ 4:52 am
Thank you so much for the detail you included in your bottle label removing instructions. I’m contacting you just to check if any new “tweaks” have been discovered since your article. I had a favorite bourbon in college (1967) but the distillery discontinued it in the 1980’s. I searched for a bottle of it, but an unopened bottle now brings $400 to $600! So, I started searching for an empty bottle around 2000 so I could salvage the label. I posted on various web sites and in 2022 (22 years later) a fellow connoisseur contacted me with an empty bottle. (Nothing ever goes away on the internet!) The highly colored paper label appears to be affixed with dry glue, but I am petrified that I will damage it trying to remove it. I even tried to find someone in the antique art field to do it, but to no avail, so while biting a leather strap for possible pain relief, I have resolved to try myself. Do you have any last-minute or new instructions? Thank you for any help you can provide me.
November 21, 2023 @ 10:21 am
With dry glue, the only way I found to remove it is to soak. Obviously, this is very risky with an antique. Is there any way you can test with a smaller label on the neck of the bottle to see how the printing holds up? What are you planning to do with the removed label? You might do just as well to scan it if you are planning to display it or frame it.