One of our most popular posts here at TB is “How to Remove Bottle Labels, Intact, in 15 Minutes”, so we know lots of our readers are saving the labels from their favorite beers. That said, cans are becoming much more popular with breweries for lots of reasons. Well, we did the research and you’ll be glad to know that it’s even easier to remove beer can labels than from a bottle. We’ve put together all the tips and tricks we could come up with and we’re thrilled to present them to you!
As a rule of thumb, we highly recommend that you practice this on some labels you don’t intend to save. Make some mistakes first before you screw up your favorites. We literally peeled hundreds of beer can labels off to make sure these techniques work with the majority of labels you’re likely to find. Not all labels are created equal and there’s definitely some easier to remove than others.
Contents
First, What Kind of Label Do You Have?
Unless it’s printed directly on the aluminum, there’s two basic kinds of can labels – shrink-wrap sleeves and sticker labels. How you remove each is completely different.
Printing directly onto cans is usually something only the highest-production breweries can afford. Alternatively, some breweries will print a basic, generic-use can and then apply a label onto that for different beers.
Shrink-Wrapped Sleeve Labels
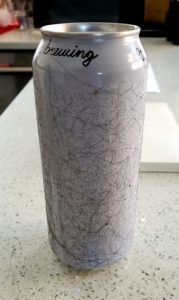
Stickers should be pretty easy to identify, but let’s talk about shrink-wrapped sleeves. A sleeve is basically a plastic film that has been heated to shrink wrap your can. They are typically glossy plastic and if you look carefully, you can see the edge on the top or bottom of the can.
Jump to the The “Clamp and Spin Technique” for Removing Shrink Sleeve Labels
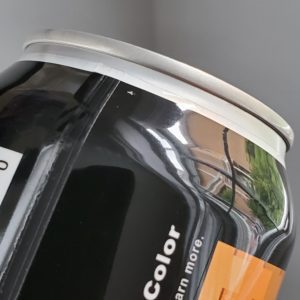
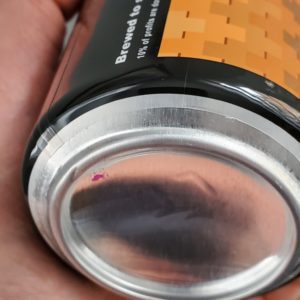
Sticker Labels
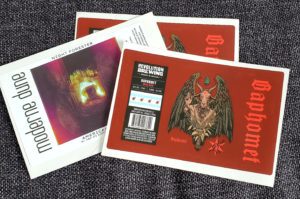
Stickers come in all shapes and sizes. Some wrap entirely around the can and even overlap at the edges. Others are die-cut shapes that allow parts of the can underneath show through. Sticker beer can labels come in all finishes and are limited only by the printing process. You might even see matte finish labels with glossy enhancements to make elements stand out.
It’s worth mentioning that both types of labels are plastic. If you are planning to mount and frame your favorite can label, it will not be “archival” material and may degrade over time. Putting a plastic label in direct sunlight under plexiglass may result in yellowing, fading, or cracking.
Jump to the “Tap and Cap Method” of removing Sticker Labels
Both Wrapped AND Sticker
Yup, you can have both. Some breweries will wrap their cans with a branded general-use label and then put a sticker on top of that. Pretty wasteful if you ask me, especially when you can probably print directly onto a can for that price, but I don’t pay their bills!
Oh hey! FYI… any links on this page that lead to products on Amazon or other online retailers are affiliate links and we earn a commission if you make a purchase. Thanks in advance for your support!
The “Clamp and Spin Technique” for Removing Shrink Sleeve Labels
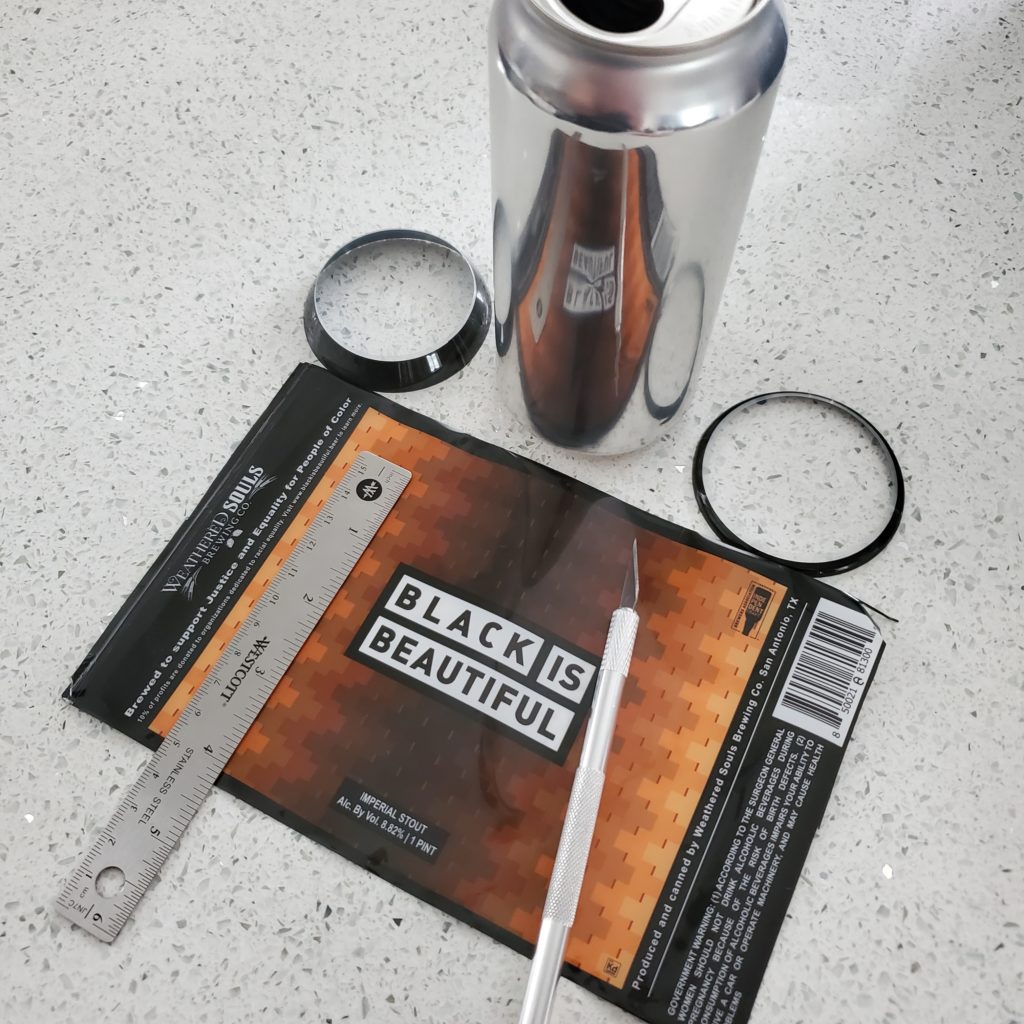
The nice thing about shrink-wrapped labels is they do not use any adhesive. Just cut them in the right places and they should fall right off. But how to cut a round can? So glad you asked.
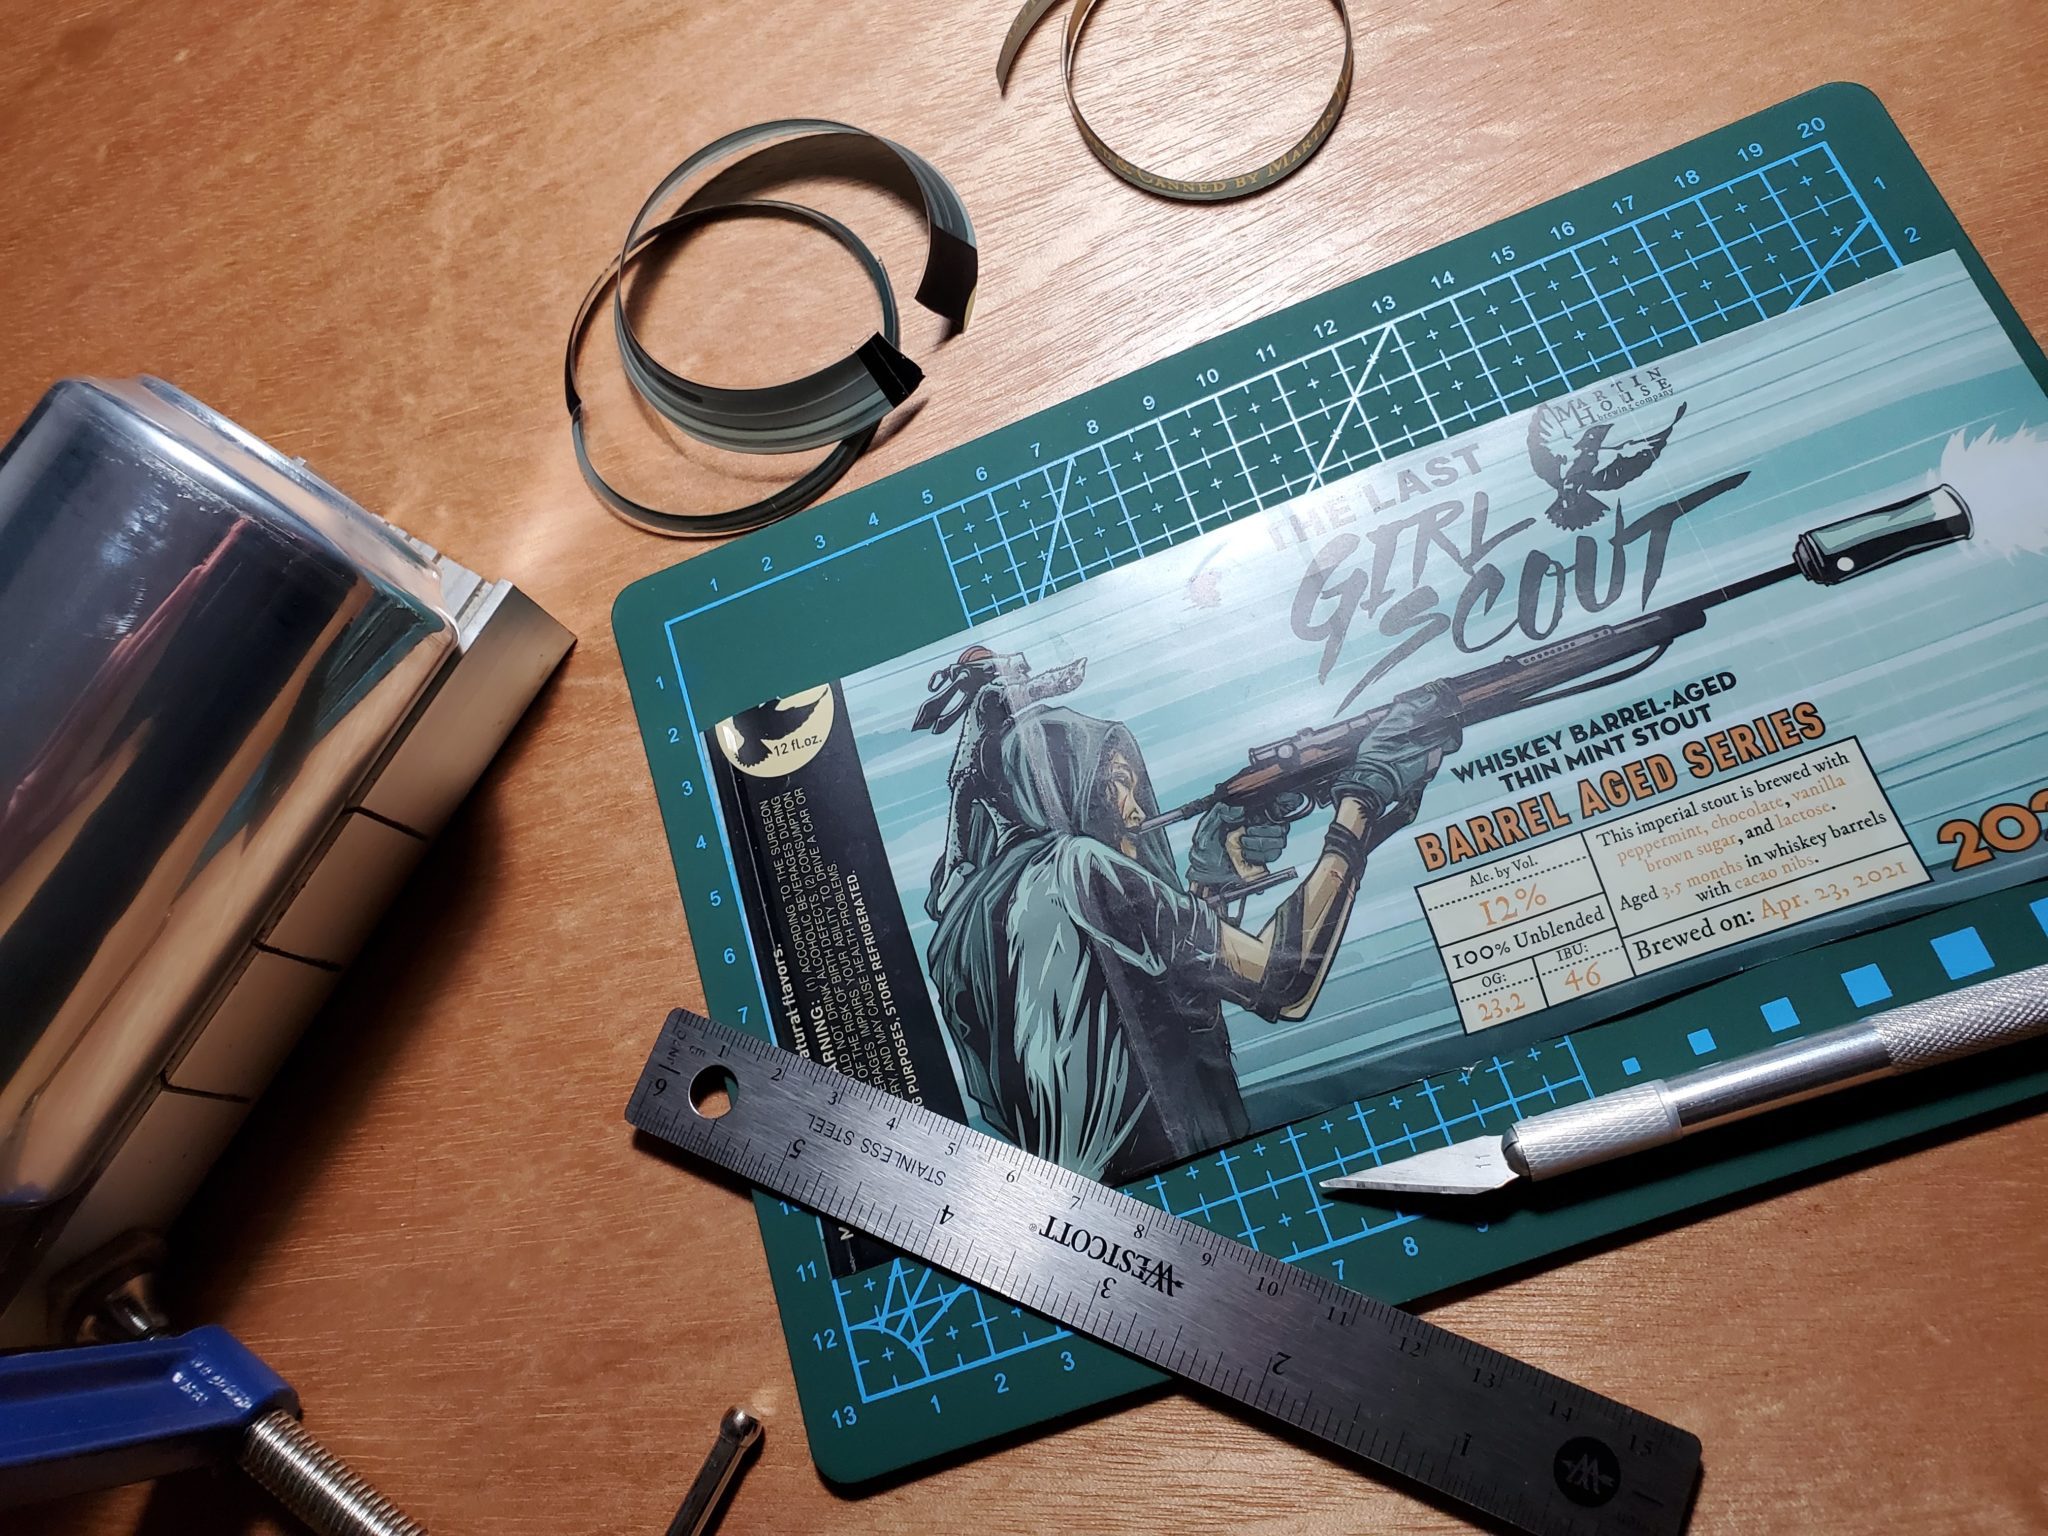
The goal is to generate a flat piece of plastic with as much art on it as possible. We will do this by cutting away the curved bits, being left with a tube. Then we will cut the seam and flatten the label out.
What You’ll Need
You don’t really need to buy anything except a nice sharp blade, but these items will definitely help you.
Mitre Box
Anything around your house that allows you to spin the can in place, without slipping away, will work, but a Mitre Box is a good option.
- 5.5 Inch Small Mitre Box. Suitable Size of Materials to Be Cut -- Maximum thickness: 0.79 inch (20mm); maximum width: 1.57 inch (40mm). Products Dimension; 140*50*33 mm (5.5*1.97*1.3 inch). Ideal for hobbyists and wood workers.
Prices pulled from the Amazon Product Advertising API on:
Product prices and availability are accurate as of the date/time indicated and are subject to change. Any price and availability information displayed on [relevant Amazon Site(s), as applicable] at the time of purchase will apply to the purchase of this product.
Razor Blade or X-Acto Knife
- Precision knife with number 11 fine point blade for exact cuts
Prices pulled from the Amazon Product Advertising API on:
Product prices and availability are accurate as of the date/time indicated and are subject to change. Any price and availability information displayed on [relevant Amazon Site(s), as applicable] at the time of purchase will apply to the purchase of this product.
Cork-Backed Straight edge
Smaller is better in this case, since you need to lay this along the side of a can. Any metal straight edge will work, but a small cork-backed ruler will keep it from slipping while you cut.
- Warp-free, bend-resistant stainless steel ruler
Prices pulled from the Amazon Product Advertising API on:
Product prices and availability are accurate as of the date/time indicated and are subject to change. Any price and availability information displayed on [relevant Amazon Site(s), as applicable] at the time of purchase will apply to the purchase of this product.
C-Clamp
Use one or two of these to keep your can from slipping out of your grasp. Thirsty Bastards is not responsible for cuts, slices, pokes, stabs, or other personal injuries related to your unstable working area.
Prices pulled from the Amazon Product Advertising API on:
Product prices and availability are accurate as of the date/time indicated and are subject to change. Any price and availability information displayed on [relevant Amazon Site(s), as applicable] at the time of purchase will apply to the purchase of this product.
Self-Healing Cutting Mat
I went to Art School and you wouldn’t be caught dead without one of these. Whether you’re a crafty person or just plain handy, having a surface to cut paper and other materials is just nice to have around.
Prices pulled from the Amazon Product Advertising API on:
Product prices and availability are accurate as of the date/time indicated and are subject to change. Any price and availability information displayed on [relevant Amazon Site(s), as applicable] at the time of purchase will apply to the purchase of this product.
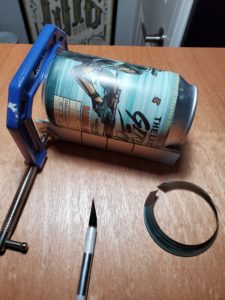
How to Remove A Shrink Sleeve Label
- Lay the can on mitre or other stable surface
- Put clamps in place to keep it steady (optional)
- Firmly hold blade against the can
- Rotate the can until the label is cut all the way around
- Remove excess film
- Repeat for other end of can
- Cut the sleeve along the seam
- Remove label
Lay the can on mitre or other stable surface
A Mitre Box can be used to keep the can in place while still turning it against the blade. Another great option if you don’t have a mitre box is a utensil drawer in your kitchen. Anything that allows you to keep the can steady while you roll it will work. The idea is to create a makeshift lathe that allows you to rotate the can while keeping it in place to apply enough pressure to the blade.
Put clamps in place to keep it steady (optional)
Clamps are probably something you have laying around that can help keep the can in place. If you are using a mitre box, you may even want to clamp it to your workbench or table.
Firmly holding the blade against the can, rotate the can until the label is cut all the way around
While cutting, you will keep the blade stationary. The cutting will occur as you move the can, much the same way a lathe can be used to turn wood for shaping. However you choose to brace the blade against the can, make sure you can do so at a consistent pressure and angle. Keep turning until you have cut all the way around the can.
Remove excess film
You should have a nice clean ring of plastic that comes right off the can.
Cut the sleeve along the seam
Lay the can flat on a surface that will keep it in place. The mitre box is also a good option here. Place your straight edge on the seam of the sleeve (or wherever it makes sense to cut it) and cut the sleeve length-wise. Too much pressure can bend the can, so make sure your blade is super sharp.
Remove the label
If you’ve cut through the film completely, the label should come right off and lay perfectly flat. If it doesn’t, you may need to trim more of the curved edge off until it does.
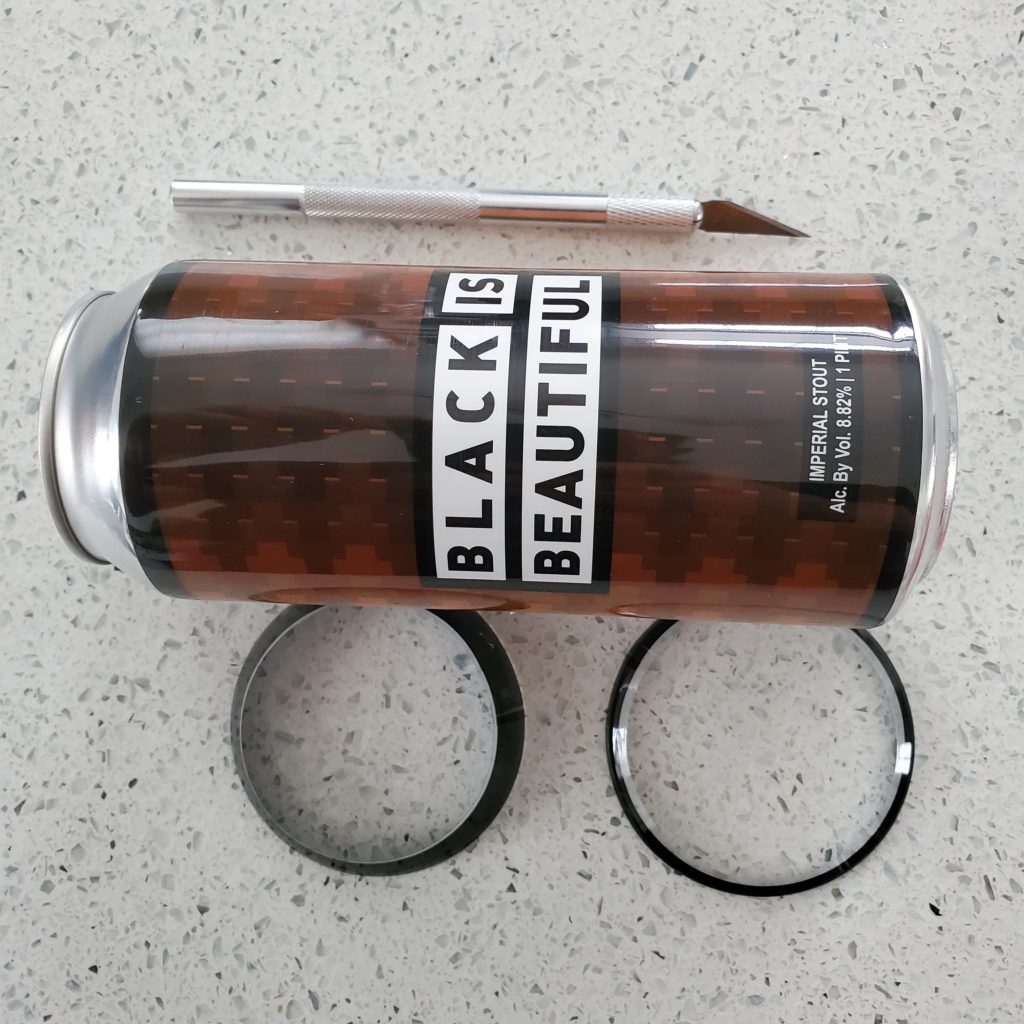
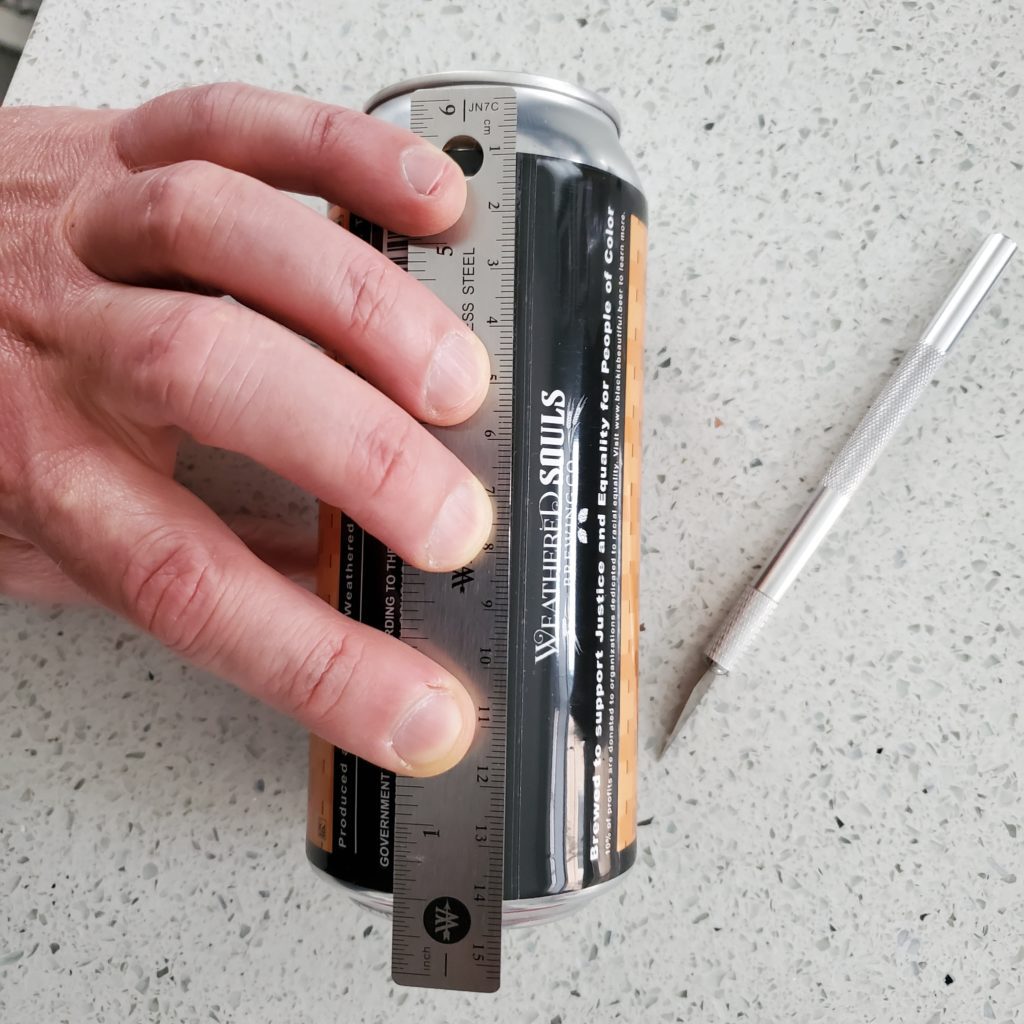
The “Tap and Cap Method” of Removing Sticker Labels
As with removing sticker labels from bottles, heat is your best friend. However, unlike glass, aluminum is thin and does not retain heat for long. The trick in getting sticker beer can labels off, therefore, is to keep them hot enough, for long enough, for the adhesive to get soft and gooey.
We’ll be filling the can with super hot tap water. Using a can cap that is water-tight is the best way we’ve found to keep hot water in the can without suffering burns. The can will be hot enough without you scalding yourself on spills, so that’s where the “Tap and Cap Method” comes into play!
What You’ll Need
Ove Glove
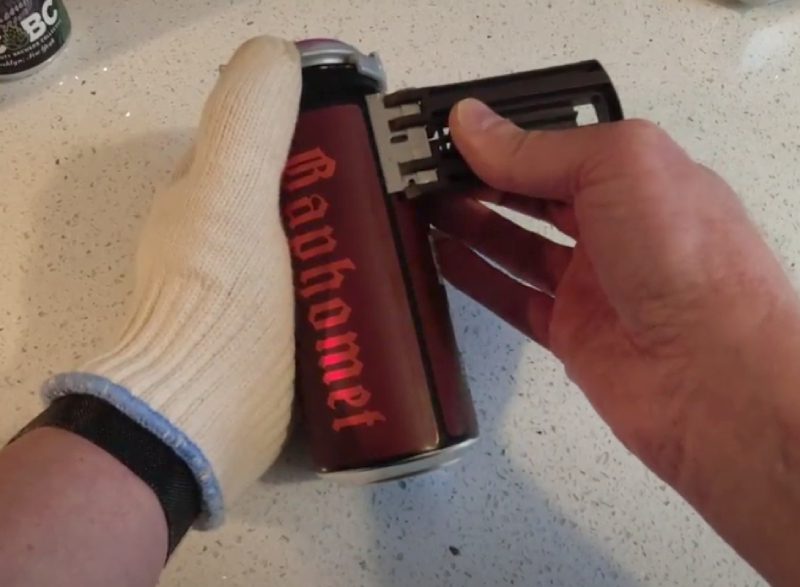
If you didn’t already buy one for removing bottle labels, trust me when I say the Ove Glove is your label removal BFF. You want something that allows for dexterity as well as protection from the heat. I know it doesn’t seem like a can will get very hot from plain ol’ tap water, but trust me – IT DOES!
- THE OVE GLOVE: Comes with 2 machine washable, hot surface handler The Ove Glove.
Prices pulled from the Amazon Product Advertising API on:
Product prices and availability are accurate as of the date/time indicated and are subject to change. Any price and availability information displayed on [relevant Amazon Site(s), as applicable] at the time of purchase will apply to the purchase of this product.
Fizz Keeper Can Cap
You’ll be thanking me in the comments for suggesting you buy these “can keepers”. Not only are they great for keeping hot water from spilling onto you while removing labels, they’re also great for making half-drunk cans last longer.
- Creates a seal around the top of your can to lock in liquid from spilling AND keep CO2 from escaping
Prices pulled from the Amazon Product Advertising API on:
Product prices and availability are accurate as of the date/time indicated and are subject to change. Any price and availability information displayed on [relevant Amazon Site(s), as applicable] at the time of purchase will apply to the purchase of this product.

I tried these can savers for label removal and they don’t stay on a hot can. They may be good for keeping a beverage fresh, but don’t use them for this project as you may get burned.
Razor Blade Holder
I like a razor blade holder that stays out of the way like this one. The best kind will be thin and light, but also extends the blade out far enough to get under the edge of the label.
- 2-Piece razor scrapers and extra 20-piece blades
Prices pulled from the Amazon Product Advertising API on:
Product prices and availability are accurate as of the date/time indicated and are subject to change. Any price and availability information displayed on [relevant Amazon Site(s), as applicable] at the time of purchase will apply to the purchase of this product.
Card Stock
Depending on your label saving intentions, at the very minimum you do NOT want to drop your label onto plain old printer paper. Get something nice and heavy, that won’t buckle, like this.
- WHITE INDEX CARDSTOCK: Providing sturdy and strong results, this 110 lb. Index cardstock is heavier than standard 65 lb. cardstock
Prices pulled from the Amazon Product Advertising API on:
Product prices and availability are accurate as of the date/time indicated and are subject to change. Any price and availability information displayed on [relevant Amazon Site(s), as applicable] at the time of purchase will apply to the purchase of this product.
Sticker Paper
Want to make your own stickers? This stuff is great if you don’t know what you want to do with your beer can labels, and you want to keep your options open. Assuming most of the adhesive is intact, you can trim the image you like and apply it to your laptop, water bottle, or the bumper of a Chevy Geo.
“Release Paper” is basically the backing substrate of stickers. It’s silicone-coated and you can apply sticky items to it without permanent adhesion. These 8.3″ × 5.7″ sheets are the perfect size for 16 oz beer can labels.
- Our diamond painting release paper is of wide applications. Not only you can use it to protect your diamond painting from any dust but also you can use it as a parchment paper while baking. You can use it to make stickers with the adhesive tape as a tool for notebook as well.
Prices pulled from the Amazon Product Advertising API on:
Product prices and availability are accurate as of the date/time indicated and are subject to change. Any price and availability information displayed on [relevant Amazon Site(s), as applicable] at the time of purchase will apply to the purchase of this product.
How to Remove a Sticker Label
- Prepare your workspace
- Run your tap until it’s as hot as possible
- Remove the tab
- Fill the can with hot, but not boiling, water
- Cap the can
- Wait 4 minutes
- Lift the edge of the sticker with the razor
- Slowly and carefully peel the label off
- Apply the label to the card stock
Prepare your workspace
Your kitchen is clearly the best work space for this. Get everything you need on-hand so you aren’t fumbling around. Wash your hands. Clean your countertop and make sure it’s dry. Have your card stock at the ready. Give yourself some room.
Run your tap until it’s as hot as possible
You want your water as hot as possible, but I have found that boiling water is too hot. I even melted one of the Fizz Keeper caps when I used tea kettle water, so hot tap water will suffice. The thing is, can walls are so thin, they cool very quickly, so you want to see steam coming off your tap to know if it’s hot enough.
Remove the tab
The can tab gets in the way of the can saver lid, so you’ll want to pull that off.
Fill the can with hot, but not boiling, water
Put an Ove Glove on and fill the can as much as you are able. Try not to get it wet.
Cap the can
Put one of the can savers on the top. Make sure the lid is on tight and clicks twice when you fasten it.
Wait 4 minutes
Set a timer for four minutes. This seems to be the “sweet spot”.
Lift the edge of the sticker with the razor
After four minutes, get your glove back on your non-dominant hand. You’ll use that to keep the can in place while you carefully insert the edge of the razor blade under the edge of the label. Continue inserting and lifting along the entire length of the edge of the label until you have the whole edge lifted about a quarter inch. This should be sufficient to get a good hold of the label to remove it.
Slowly and carefully peel the label off
While slowly rotating the can, peel the label. If you don’t rotate it, the adhesive is still strong enough to pull and buckle the wall of the can. Take your time until you’ve removed the label completely.
Apply the label to the card stock
Keeping the label curled a bit, line up the vertical center of the label with the center of the card stock. You’re going to work outwards from the middle to mount the entire label. Get the center in place and gently press to anchor it. Using your fingers, press and smooth in one direction to mount one side of the label, then the other. Using even pressure, smooth out the label. Take your time – wrinkles will show!
 Are you left holding a sticky can?
File this under “Martha Stewart would be proud”:
If you have a can that has a lot of adhesive residue left on it, it makes a great lint roller! Now we certainly aren’t telling you to save a drawer full of sticky, empty cans, but if you have a dog or cat, you can probably think of a dozen places where you could use this right now.
Is it still recyclable? Can’t think of a reason why not!
Okay, I Got The Label Off. Now What?
Well, what do you want to do with it? Scrapbook it? Frame it? Make coasters? I’m not your mom.
Make A Binder for Your Labels
If you took our advice and bought Letter-sized cardstock, you can get yourself a sturdy three-hole punch and put your label collection in a binder.
You can take this in a few directions, but we prefer the “fancy pants” approach. First, go horizontal (or “landscape” if you prefer) with these presentation books.
- 1 Black Plastic Binder Folder: 24 bound (non-refillable) side loading plastic binder sleeves, Displays 48 viewable 8.5 x 11 letter size pages. Front cover has inside pocket for loose paper.
Prices pulled from the Amazon Product Advertising API on:
Product prices and availability are accurate as of the date/time indicated and are subject to change. Any price and availability information displayed on [relevant Amazon Site(s), as applicable] at the time of purchase will apply to the purchase of this product.
Make Stickers from Your Labels
Get yourself some silicone release paper and turn those hot images into stickers.
Frame Your Labels
You’ve got a lot of framing options, but you need to keep the image area in mind when shopping. Also, depending on your ability to center the label on the cardstock, you will likely want to have a mat. This allows you to cut the excess card off so it will fit in the frame AND keep the label separated from the glass so it won’t stick.
Assuming a full 360° wrap around the can…
16 oz can labels are 5″ x 8″
12 oz can labels are 3.75″ x 8″
These aren’t exactly common framing sizes, so if you want the full label, you might need to get or cut a custom mat. In most cases, however, you want to hide the legal stuff (bar code, government warning, brewery address, etc) and just show off the image area. This can reduce the actual mat opening down to around 5 inches in width.
So for 16 ounce cans, your options for pre-cut mats are 5×5 and 5×7. These come in 4-packs and a handful of color options:
- This 8x8 picture frame is made of sturdy solid wood that is built for long use. High definition plexiglass will provide you with a clearer view and preserve the life of photos.
Prices pulled from the Amazon Product Advertising API on:
Product prices and availability are accurate as of the date/time indicated and are subject to change. Any price and availability information displayed on [relevant Amazon Site(s), as applicable] at the time of purchase will apply to the purchase of this product.
These business license frames are nearly perfect for displaying a full 12-oz can label:

Making Beer Label Coasters
Sadly, coasters are four inches, so unless your image area can be cropped down to 4×4 squares, you’re SOL. But, if they can be cropped to that size, giddy-up! You can also buy larger tiles from a home improvement store. As of this writing, Home Depot sells 5.2″ square tiles. Shop around.
Remember back when we visited Nick Paul at his glass-blowing shop? Well, he liked to make coasters from labels as well. Here’s some video we shot of a more “industrial” approach to coaster making:
Epoxy Resin
This is the stuff that is used to coat countertops and it’s heat resistant. You don’t want to melt your coaster when you put your coffee mug on top, do you?
- Heat Resistant
- Epoxy Resin and Hardener Formulated with Zero VOC’s!
- Food Safe for Incidental Contact!
Prices pulled from the Amazon Product Advertising API on:
Product prices and availability are accurate as of the date/time indicated and are subject to change. Any price and availability information displayed on [relevant Amazon Site(s), as applicable] at the time of purchase will apply to the purchase of this product.
Decoupage
The technical term for gluing down a decoration to a coaster (or another object) and sealing it is “decoupage”. There’s a whole craft hobby around this that would make for a post all its own. Suffice it to say you can buy coaster-making kits if 4×4 tiles will work for you.
- Tile Kit to make your own coaster tile - everything you need included except the pictures or napkins
Prices pulled from the Amazon Product Advertising API on:
Product prices and availability are accurate as of the date/time indicated and are subject to change. Any price and availability information displayed on [relevant Amazon Site(s), as applicable] at the time of purchase will apply to the purchase of this product.
Let us know if these techniques worked for you in the comments below. We’d love to see what you’ve done with your beer can labels even if it’s just to save them. We know remembering can be difficult when you kill brain cells at the rate we do!









September 12, 2022 @ 2:33 am
It looks so clean and perfectly done! I know if I did that, no matter how much I tried there would be flaws visible
February 9, 2023 @ 8:01 pm
I fill bottles and cans with the hottest water my tap can produce, then submerge them in the kitchen sink. 1-2 tablespoons of Oxiclean helps to break down adhesive. Its easy to tell when the easy ones are ready to come off. Dabbing them with a clean towel gets water off the label, then laying them on wax paper backing with paper over the front and putting them inside a big fat phone book (remember those) will leech remaining moisture from the label and keep them flat.
Labels on aluminum are a godsend. I prefer a single-edged razor blade to start on a corner of the label. Its easier to work with and the tension of the portion that has been removed helps to loosen the rest of the label. No tears that way wither.
I recycle frozen food boxes for label backing. Because I scan my labels in a flatbed scanner, having a mixture of brown and white cardboard food packaging available allows good scans whether labels are edged in white or colored. Serves my hobby and helps to keep the environment a bit cleaner in the process.
Cheap paper labels are a problem no matter what. Really high-quality glue is still a problem. Google image searches are always a handy backup.
A warning about Oxiclean: Do not use Oxiclean for labels on foil or on clear backing. Colors will come off those labels, starting with red. I still have one bottle from a brewery that went out of business in 1999. I am keeping it until I figure out how to save all colors during the label removal process.